How to Configure WHMCS with cPanel Automatically
Managing hosting accounts manually can consume a lot of time, especially if you are running a reseller hosting business or managing multiple hosting clients. This is where WHMCS automation becomes extremely useful.
WHMCS allows hosting providers and resellers to automate account creation, billing, suspension, renewals, and hosting management directly with cPanel and WHM.
In this complete HostingInIndia tutorial, we will show you how to configure WHMCS with cPanel automatically step-by-step without missing any important settings.
What is WHMCS Automation?
WHMCS (Web Host Manager Complete Solution) is a powerful hosting billing and automation platform used by web hosting companies and reseller hosting businesses.
It automates multiple tasks including:
- Hosting account creation
- Invoice generation
- Domain registration
- Service suspension
- Account termination
- Support ticket management
- Payment processing
When integrated with cPanel/WHM, WHMCS can automatically create hosting accounts immediately after successful payment.
Benefits of WHMCS + cPanel Integration
Integrating WHMCS with cPanel provides multiple benefits for hosting businesses.
Key Advantages Include:
✅ Automatic hosting account creation
✅ Automated billing and invoicing
✅ Instant account activation after payment
✅ Automatic suspension for overdue invoices
✅ Centralized client management
✅ Reduced manual work
✅ Better customer experience
✅ Scalable reseller hosting operations
For reseller hosting providers, this integration helps save time and improve efficiency significantly.
Requirements Before Setup
Before configuring WHMCS with cPanel, make sure you have the following:
Required Items:
- WHMCS installed and activated
- cPanel/WHM server access
- Root access or reseller privileges
- WHM hostname or server IP
- Server SSH access (optional)
- SSL certificate installed
- Valid cPanel hosting packages created
Step 1: Generate cPanel API Credentials
WHMCS communicates with your cPanel server using API credentials or access hash authentication.
To generate the required credentials, follow these steps carefully.
Login to WHM
Access your WHM (Web Host Manager) dashboard.
Usually accessible via:
https://yourserverip:2087
or
https://hostname:2087
Navigate to Development Section
Inside WHM, go to:
Development >> Manage API Tokens
Create API Token
Now click on:
Generate Token
Enter:
- Token Name
- Permissions (Full privileges recommended)
Click on:
Save
Copy API Token
After generating the token, copy the API token immediately and save it securely.
You will need this token while configuring the server inside WHMCS.
Step 2: Login to WHMCS Admin Area
Now login to your WHMCS Admin Dashboard.
Usually accessible via:
https://yourdomain.com/admin
Step 3: Add cPanel Server in WHMCS
Inside WHMCS Admin Area, navigate to:
System Settings >> Servers
Click on:
Add New Server
Step 4: Enter cPanel Server Details
Now fill in the required server details carefully.
Basic Server Information
Field | Description |
Name | Your Server Name |
Hostname | Your cPanel Server Hostname |
IP Address | Server IP Address |
Type | cPanel |
Username | root or reseller username |
Password/API Token | Enter generated API Token |
Server Access Configuration
Select:
👉 Secure SSL Connection
Recommended Port:
👉 2087
Test Server Connection
After entering all details, click on:
Test Connection
If everything is configured correctly, WHMCS will display a successful connection message.
Now click:
Save Changes
Step 5: Create Server Group
Server groups help distribute hosting accounts automatically across servers.
Navigate to:
System Settings >> Servers >> Create New Group
Configure Server Group
Enter:
- Group Name
- Select Added Server
- Choose Fill Type
Recommended Fill Type:
👉 Add to the least full server
👉 Save the server group.
Step 6: Create Hosting Packages in WHM
Before creating products in WHMCS, you must create hosting packages inside WHM.
Navigate to Packages Section in WHM
Go to:
👉 Packages >> Add a Package
Create Hosting Plan
Enter:
- Package Name
- Disk Space
- Bandwidth
- Email Limits
- Database Limits
- FTP Limits
Click:
👉 Add
Repeat this process for all hosting plans.
Step 7: Create Hosting Products in WHMCS
Now configure hosting products inside WHMCS.
Navigate to:
👉 System Settings >> Products/Services
Create Product Group
Click:
👉 Create a New Group
Example:
- Shared Hosting
- Reseller Hosting
- VPS Hosting
Save changes.
Create New Product
Now click:
👉 Create a New Product
Product Configuration
Select:
- Product Type: Hosting Account
- Product Group
- Product Name
Click:
👉 Continue
Step 8: Configure Module Settings
Inside the product settings, open:
👉 Module Settings
Select cPanel Module
Choose:
👉 cPanel
Configure Automation Settings
Now select:
- Server Group
- WHM Package Name
- Username format
- Password generation settings
Enable Automatic Provisioning
Under automation settings select:
Automatically setup the product as soon as the first payment is received
This enables instant account creation after successful payment.
Save changes.
Step 9: Configure Product Pricing
Navigate to:
Pricing Tab
Set:
- Monthly pricing
- Quarterly pricing
- Annual pricing
👉 Enable payment gateways if required.
👉 Save settings.
Step 10: Setup WHMCS Cron Job
WHMCS cron jobs are required for automation tasks.
These tasks include:
- Invoice generation
- Service suspension
- Renewal reminders
- Account termination
Locate Cron Command
Inside WHMCS Admin Area navigate to:
👉 Utilities >> System >> System Health Status
Copy the cron command.
Add Cron Job in cPanel
Login to cPanel and navigate to:
👉 Advanced >> Cron Jobs
Paste the cron command and save it.
Step 11: Test Automatic Account Provisioning
Now test the automation process completely.
Place a Test Order
- Visit your WHMCS order page
- Purchase the hosting product
- Complete payment
Verify Automatic Account Creation
After successful payment:
✅ WHMCS should automatically create the cPanel account
✅ Login credentials should be emailed automatically
✅ Hosting service should appear active inside WHMCS
Common WHMCS + cPanel Errors & Fixes
Sometimes users may encounter setup issues.
API Authentication Failed
Cause:
Incorrect API token or username.
Solution:
Regenerate API token and verify WHM username.
Account Creation Failed
Cause:
Package name mismatch.
Solution:
Ensure WHM package name matches exactly inside WHMCS module settings.
SSL Connection Error
Cause:
Invalid SSL certificate or incorrect hostname.
Solution:
Use valid hostname with SSL enabled.
Cron Job Not Running
Cause:
Incorrect cron command or permissions issue.
Solution:
Verify cron syntax and PHP path.
Why Choose HostingInIndia Reseller Hosting?
HostingInIndia provides powerful reseller hosting solutions optimized for WHMCS and cPanel automation.
Our Reseller Hosting Features Include:
✅ Free WHMCS License
✅ cPanel/WHM Access
✅ SSD/NVMe Storage
✅ White-label Hosting
✅ Free SSL Certificates
✅ High Uptime Guarantee
✅ Automatic Backups
✅ 24/7 Technical Support
Whether you are starting a hosting business or managing multiple client websites, HostingInIndia reseller hosting provides the performance and automation needed to scale efficiently.
Final Thoughts
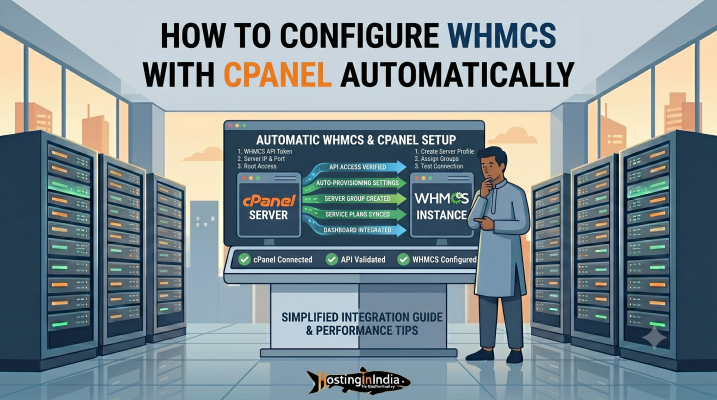
Configuring WHMCS with cPanel automation can significantly simplify hosting account management.
The complete setup process includes:
- Generating cPanel API credentials
- Adding the server inside WHMCS
- Creating server groups
- Configuring hosting packages
- Enabling automatic provisioning
- Setting up cron jobs
- Testing automation properly
Once configured correctly, WHMCS and cPanel together can automate almost every aspect of your hosting business.
If you need assistance with WHMCS setup, reseller hosting, or cPanel hosting services, feel free to contact the HostingInIndia support team.